Shopify Liteの決済機能(checkout)をGatsbyサイトに実装する方法

こんにちは、筋肉めがねです。
GatsbyでE-commerceサイトを作成するシリーズの記事、第八弾です。
前回は、Shopify BasicプランからShopify Liteプランへ変更する方法を書きました。
本日は、Shopify Liteの決済機能(checkout)をGatsbyサイトに実装する方法です。
Bogus Gatewayを設定する
先ずは、決済機能をテストするため、テスト注文ができるBogus GatewayをShopifyに設定します。
Bogus Gatewayをpayment methodとして設定する事で、クレジットカードでの支払いを問題なく受け付ける事ができるのか、検証することができます。
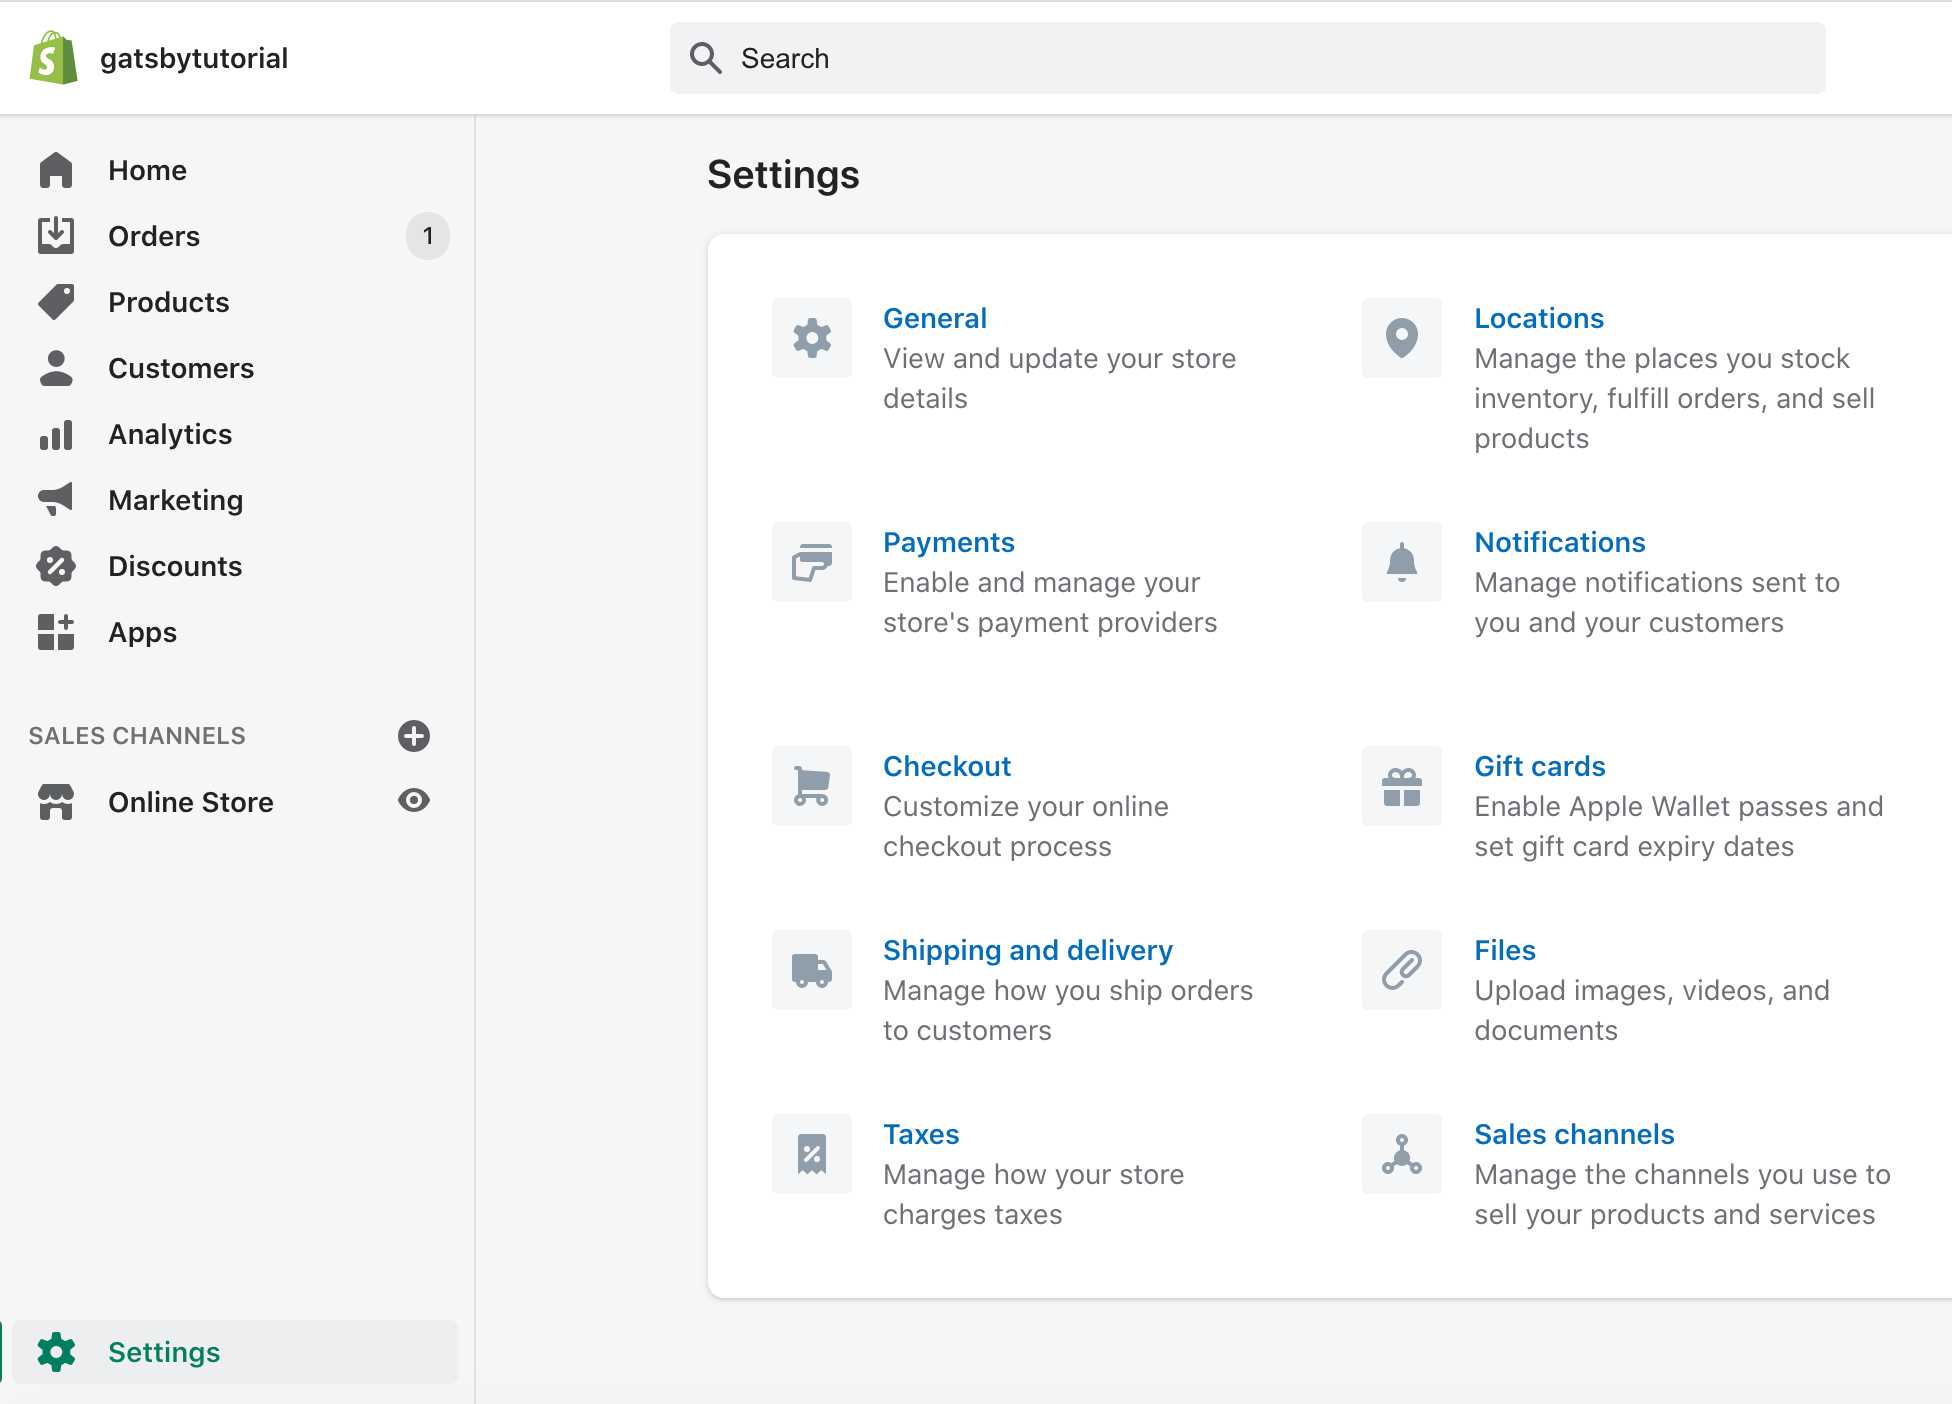
Shopifyのtopページから「Settings」、「Payments」をクリックします。
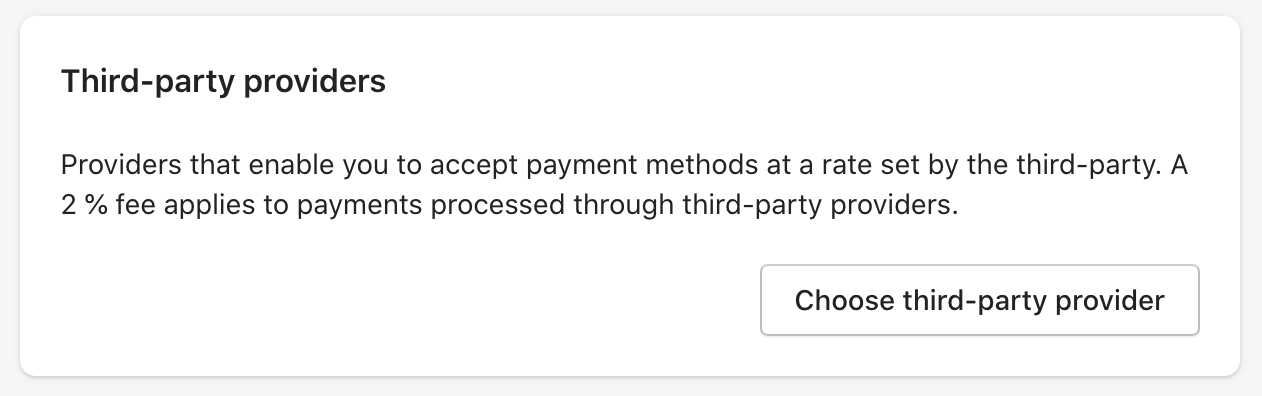
下にスクロールすると、「Third-party providers」セクションがあるので、「Choose third-party provider」を押します。
「Bogus gateway」を検索し、「(for testing) Bogus Gateway」を選択します。
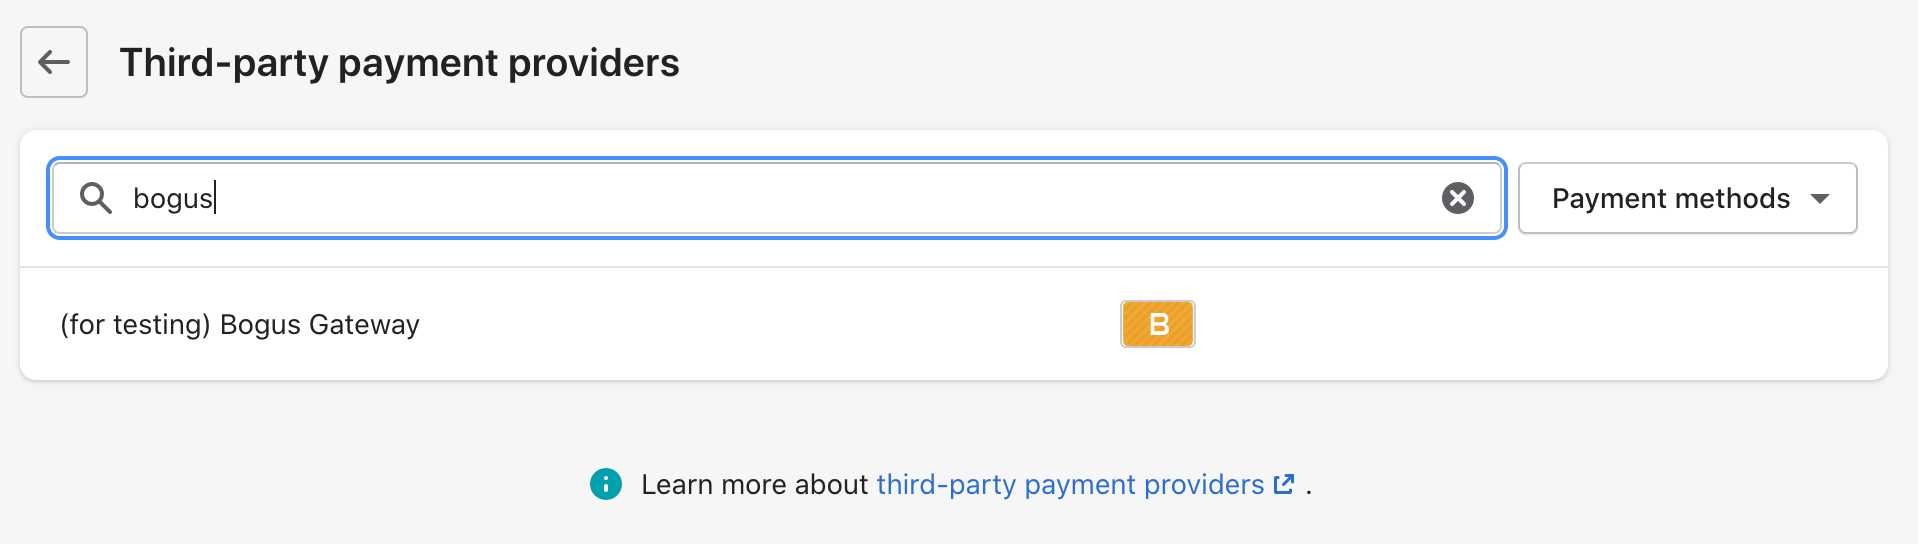
下にスクロールし、「Activate(for testing) Bogus Gateway」を押しましょう。
これで、Bogus Gatewayの設定は完了です。

特定の商品を指定して決済機能を実装する
環境変数の設定など、基本的な事は以下の記事で書いた方法(Shopify Basicプラン用)と同じですが、今回は特定の商品を指定して決済機能を実装していきます。
Shopifyの決済機能(checkout)をGatsbyサイトに実装する方法
個別商品のページである「ProductTemplateDetails」コンポーネントを以下のように変更します。
import React from 'react'
import Sidebar from '../Sidebar'
import './style.scss'
import Client from 'shopify-buy'
class ProductTemplateDetails extends React.Component {
render() {
const { product } = this.props.pageContext
async function checkout () {
// build a client
const client = Client.buildClient({
storefrontAccessToken: process.env.GATSBY_SHOPIFY_STOREFRONT_TOKEN,
domain: `${process.env.GATSBY_SHOP_NAME}.myshopify.com`,
})
// Fetch a single product by ID
const productId = 'xxx';
client.product.fetch(productId).then(() => {
// Do something with the product
client.checkout.create().then((checkout) => {
// Do something with the checkout
const checkoutId = checkout.id;
const lineItemsToAdd = [
{
variantId: "xxx",
quantity: 1,
}
];
// Add an item to the checkout
client.checkout.addLineItems(checkoutId, lineItemsToAdd).then((checkout) => {
// Do something with the updated checkout
console.log(checkout.lineItems); // Array with one additional line item
});
window.open(checkout.webUrl)
});
});
}
return (
...
<button onClick={checkout}>Buy for €{product.priceRange.minVariantPrice.amount}</button>
...
)
...
}
}
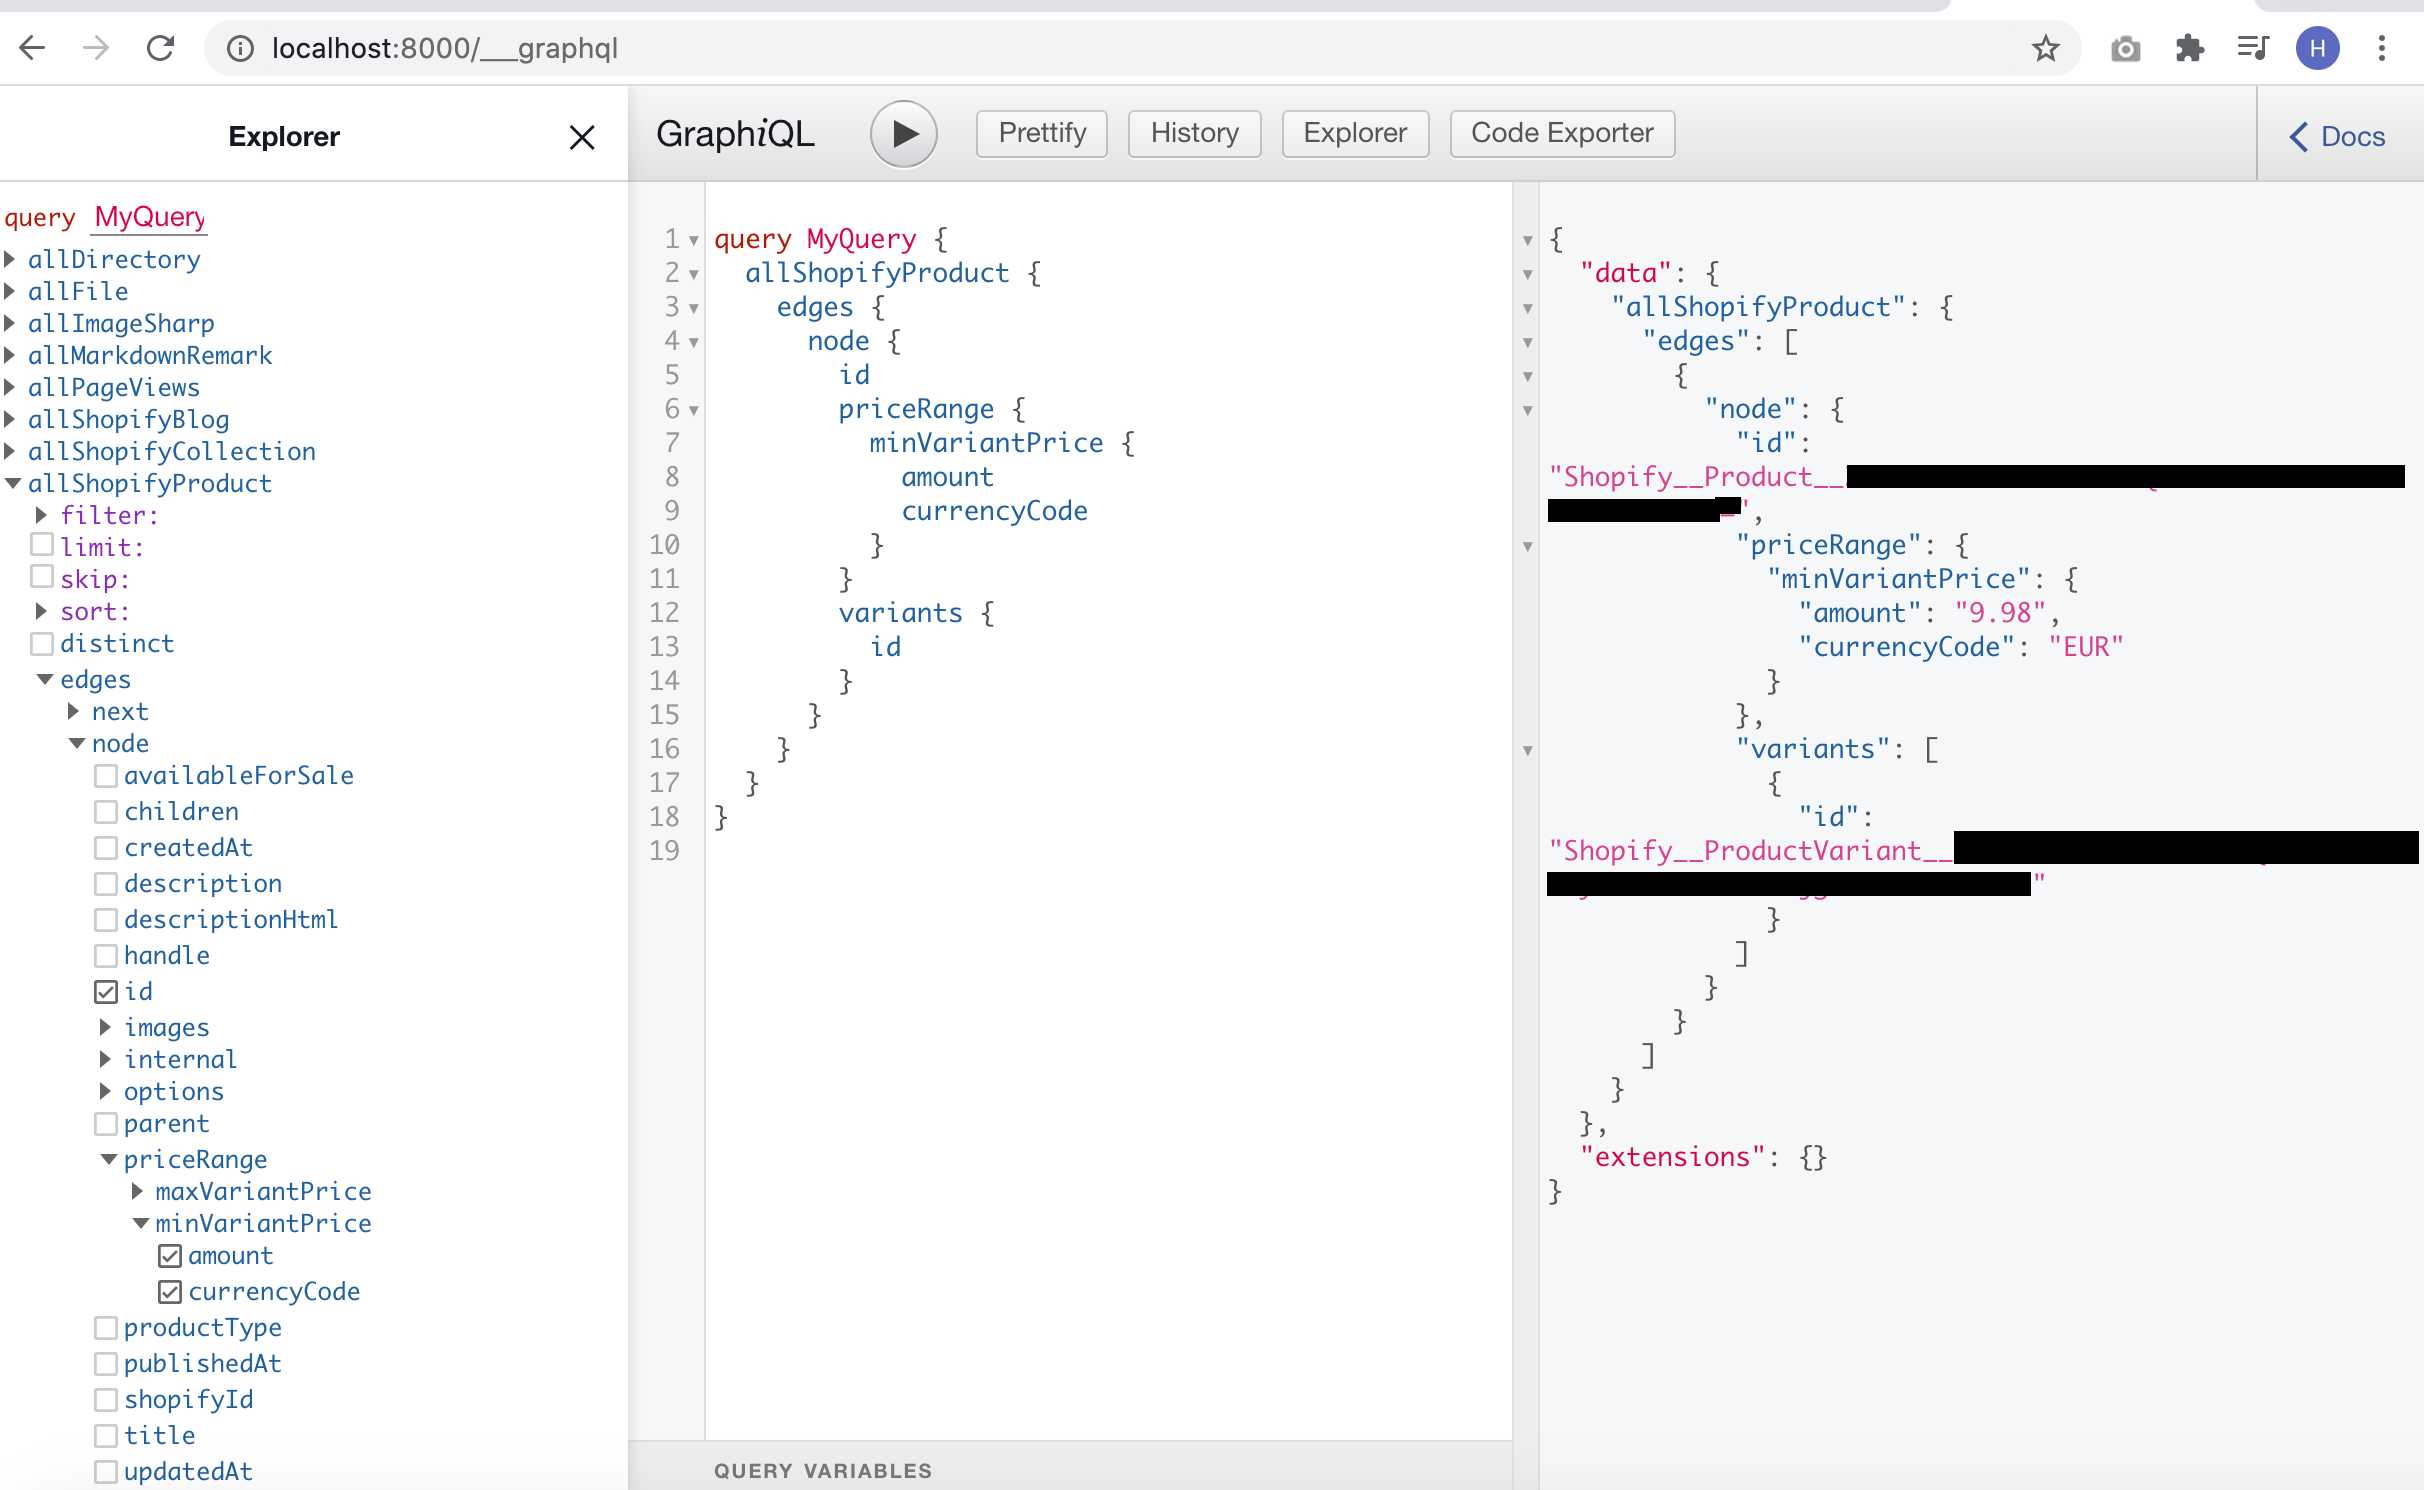
export default ProductTemplateDetails上のコードの、productId、variantIdに特定商品の情報を記載する必要がありますが、これらをGraphQLから取得します。
Gatsbyの開発環境で、http://localhost:8000/___graphqlにアクセス、以下のコマンドを入力し、「▶️」ボタンを押します。
query MyQuery {
  allShopifyProduct {
    edges {
      node {
        id
        priceRange {
          minVariantPrice {
            amount
            currencyCode
          }
        }
        variants {
          id
        }
      }
    }
  }
}
これで、productId、variantIdを取得できますので、それらを先ほどの「ProductTemplateDetails」コンポーネントに記載しましょう。どちらのIdも、「=」で終わる文字列であるはずです。
Digital productを登録して決済機能をテストする
では、決済機能のテストをしてみましょう。
今回は、Digital productを商品として登録し、ユーザーが商品を購入後、ダウンロードできるように設定しましょう。
Digital productの登録
先ずは、Digital productを登録しますが、登録方法は、以下の記事をご覧ください。
ShopifyにDigital Productを登録する方法
決済機能をテストする
それでは、決済機能をテストしていきます。
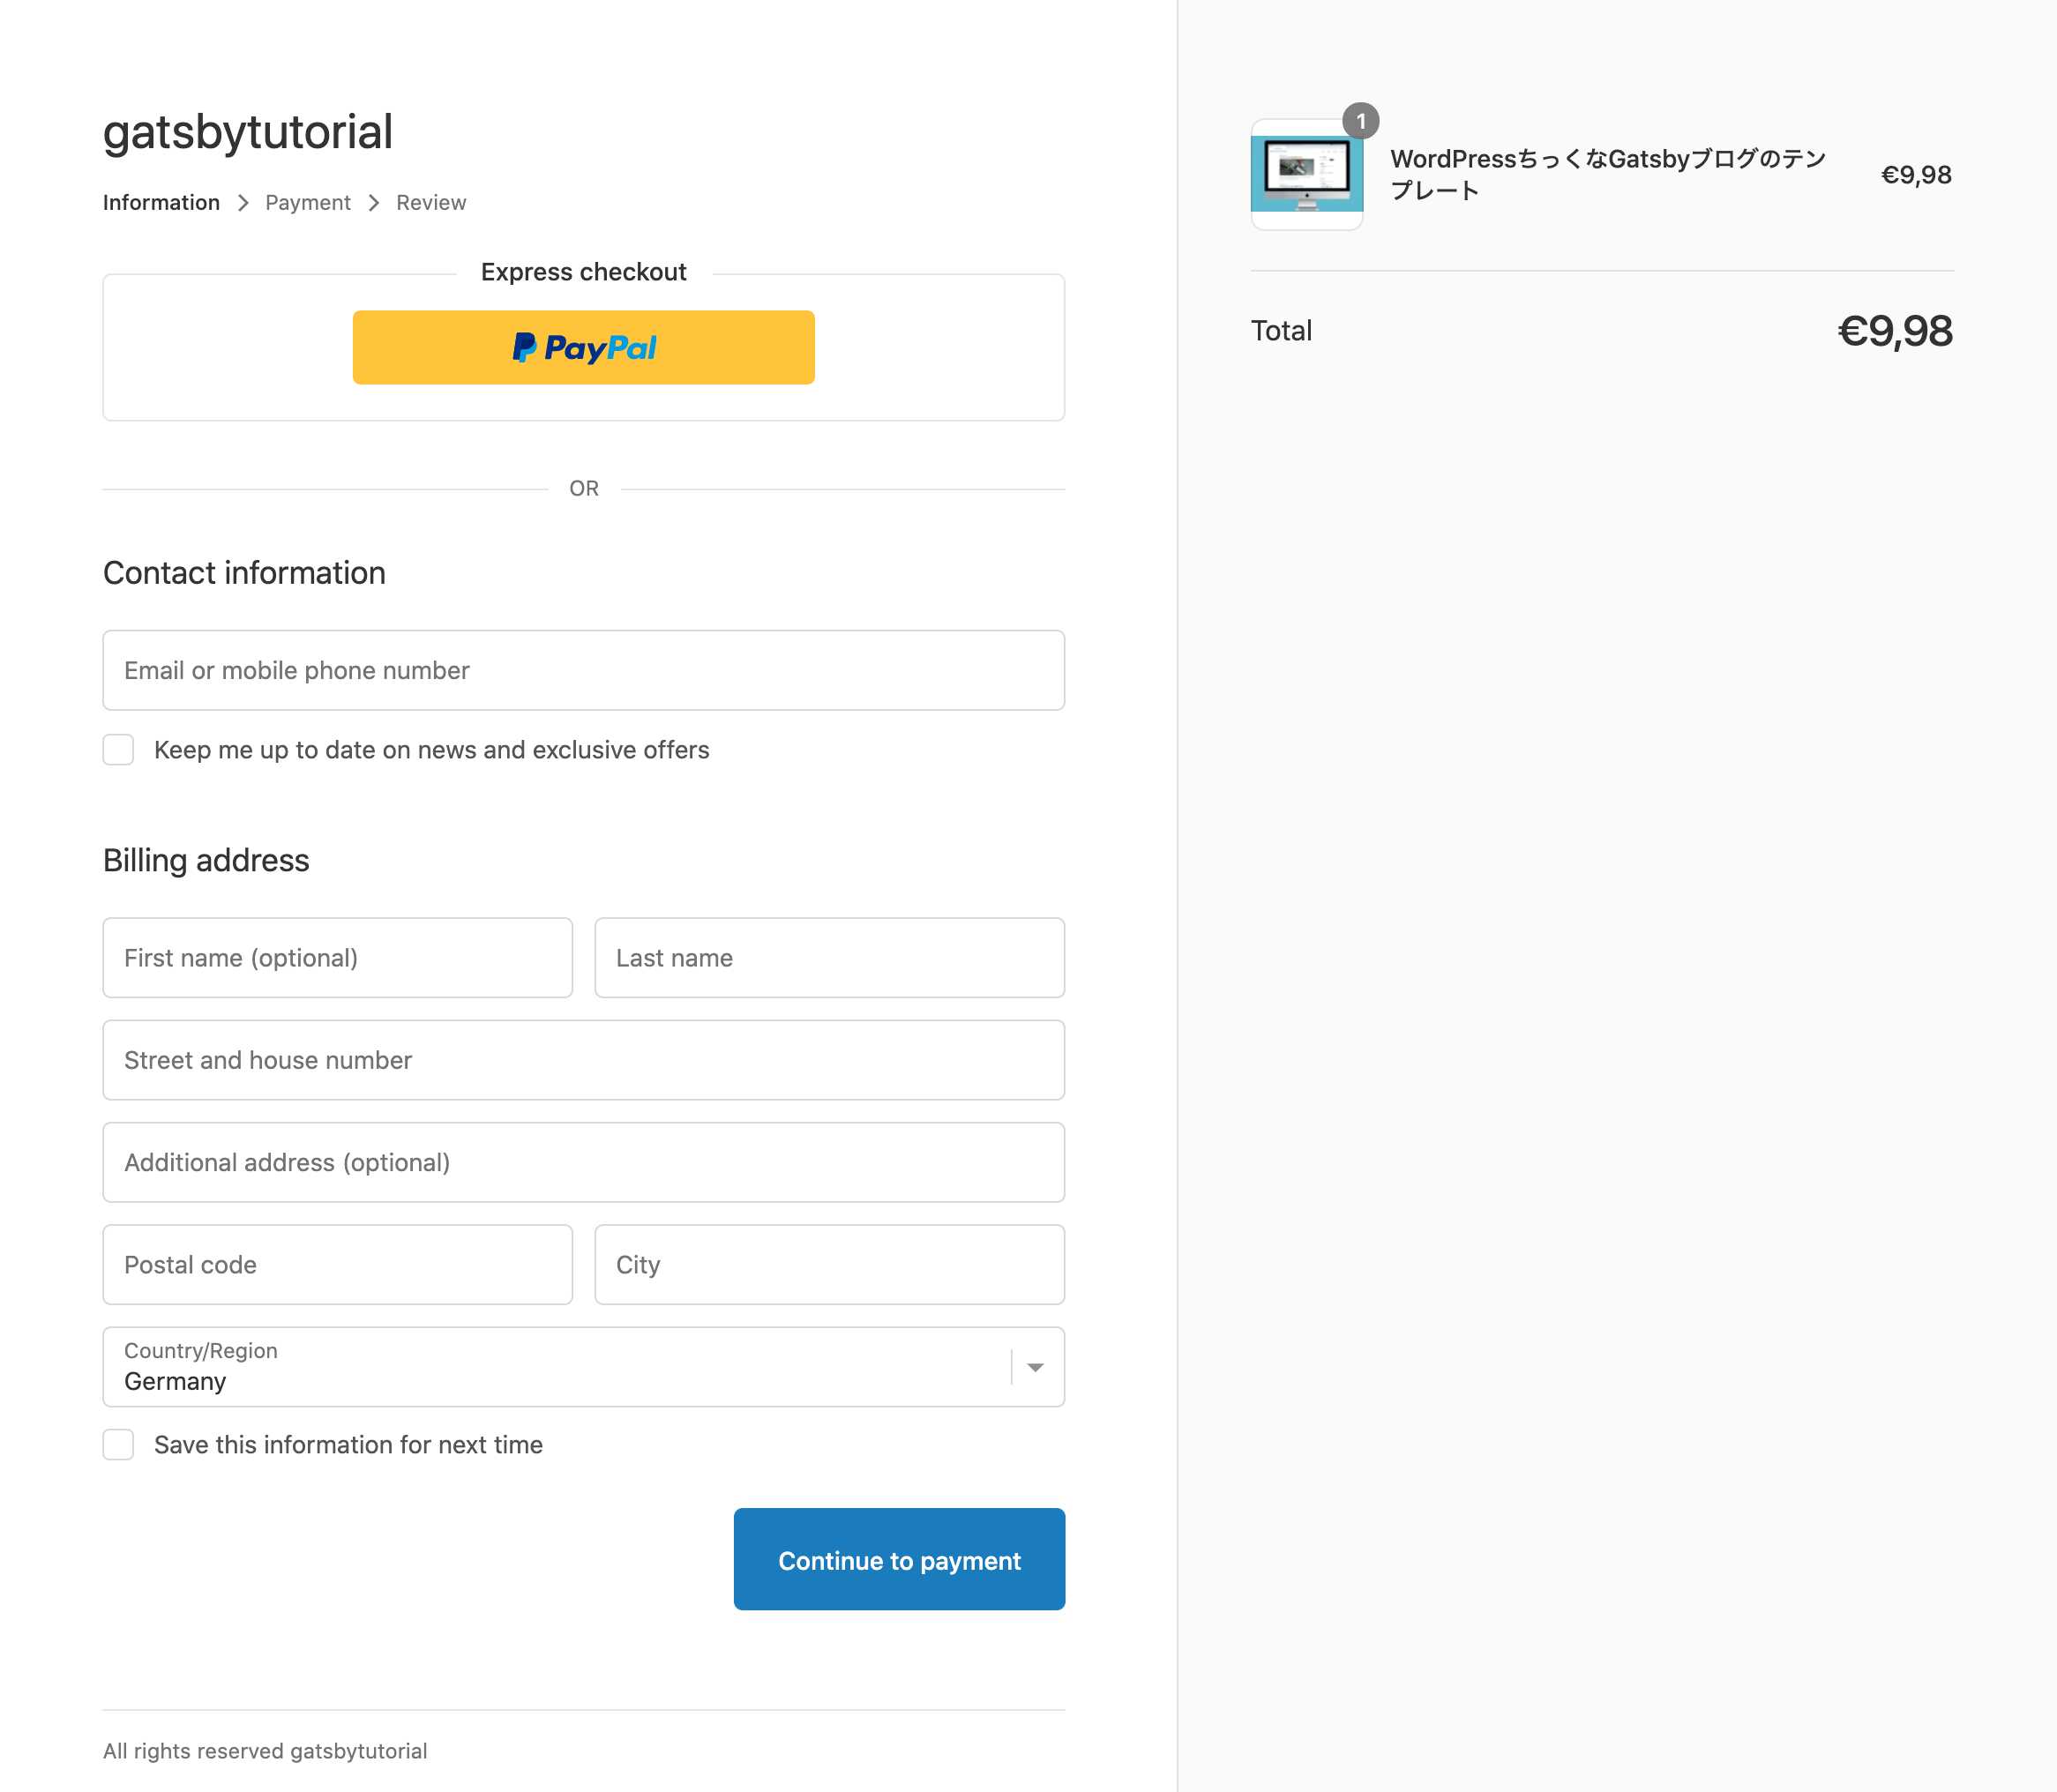
以前にProductページで実装した「Buy」ボタンを押します。
別タブで決済用の画面が表示される事が確認できますね。
必要情報を入力し、「Continue to payment」ボタンを押します。
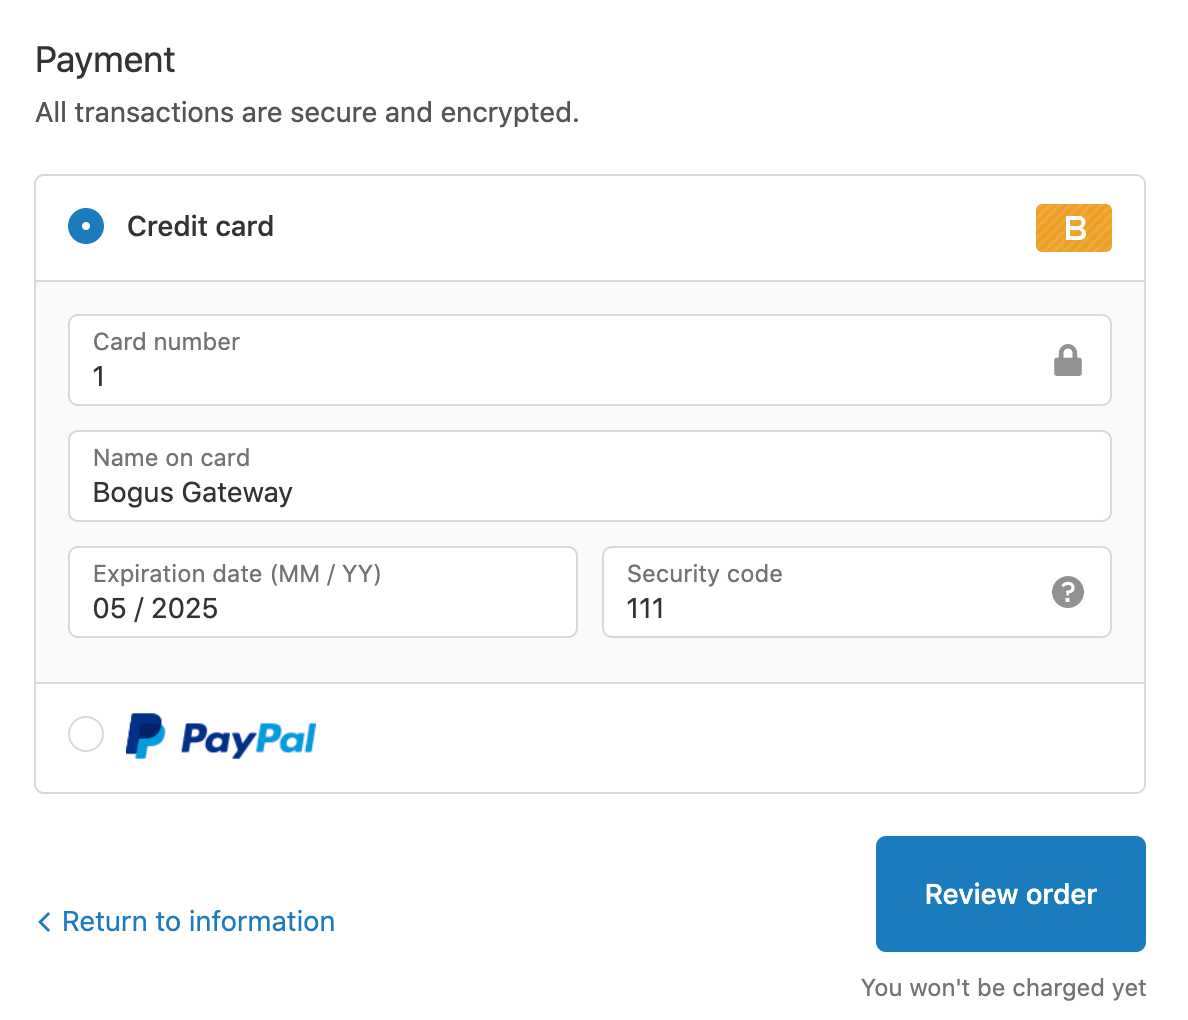
そして、ここからクレジットカード決済のテストをしていきますが、テスト時の入力値は、Bogus Gatewayで決められています。
先ずは、決済が正常に通るケースをテストします。
カード番号に「1」を入力、Name on cardは「Bogus Gateway」、「Expiration date」には未来の日付を入れ、Security codeは「111」とします。そして、「Review order」を押しましょう。
次のページで「Pay now」ボタンを押します。
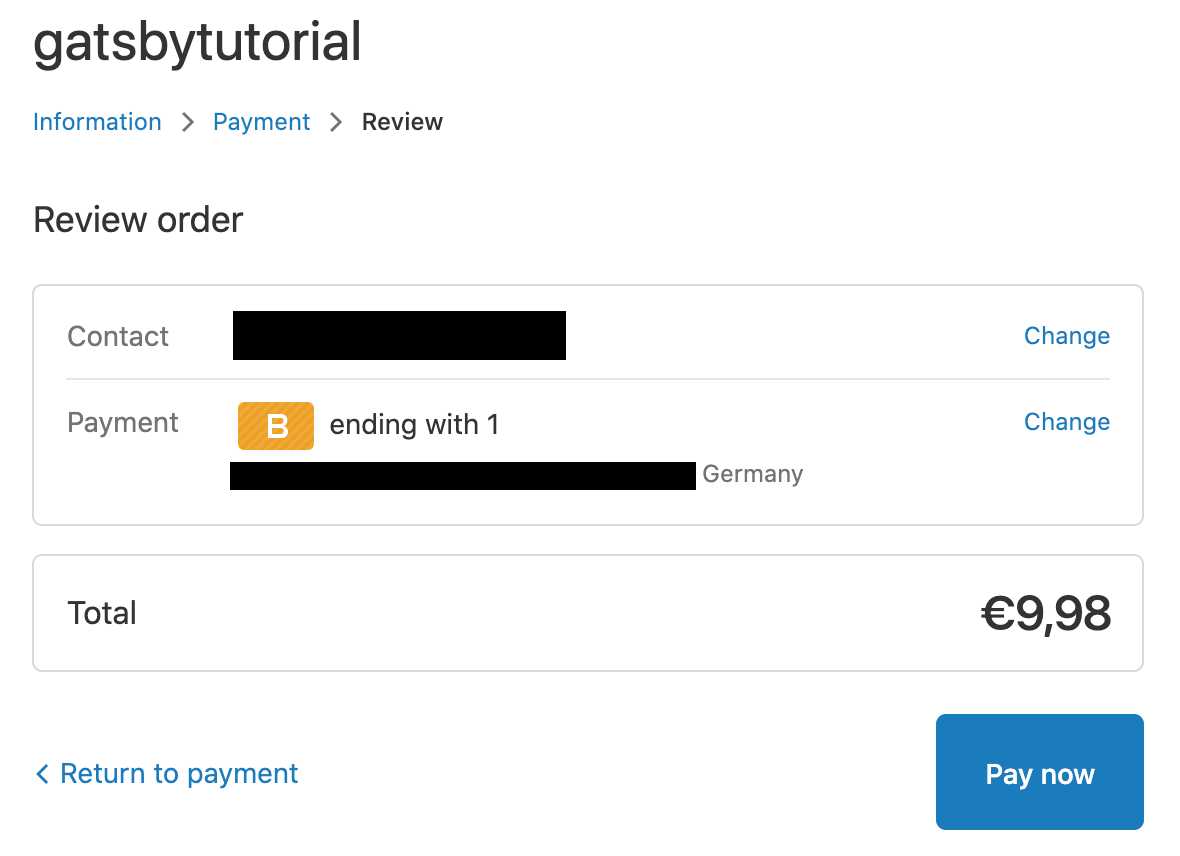
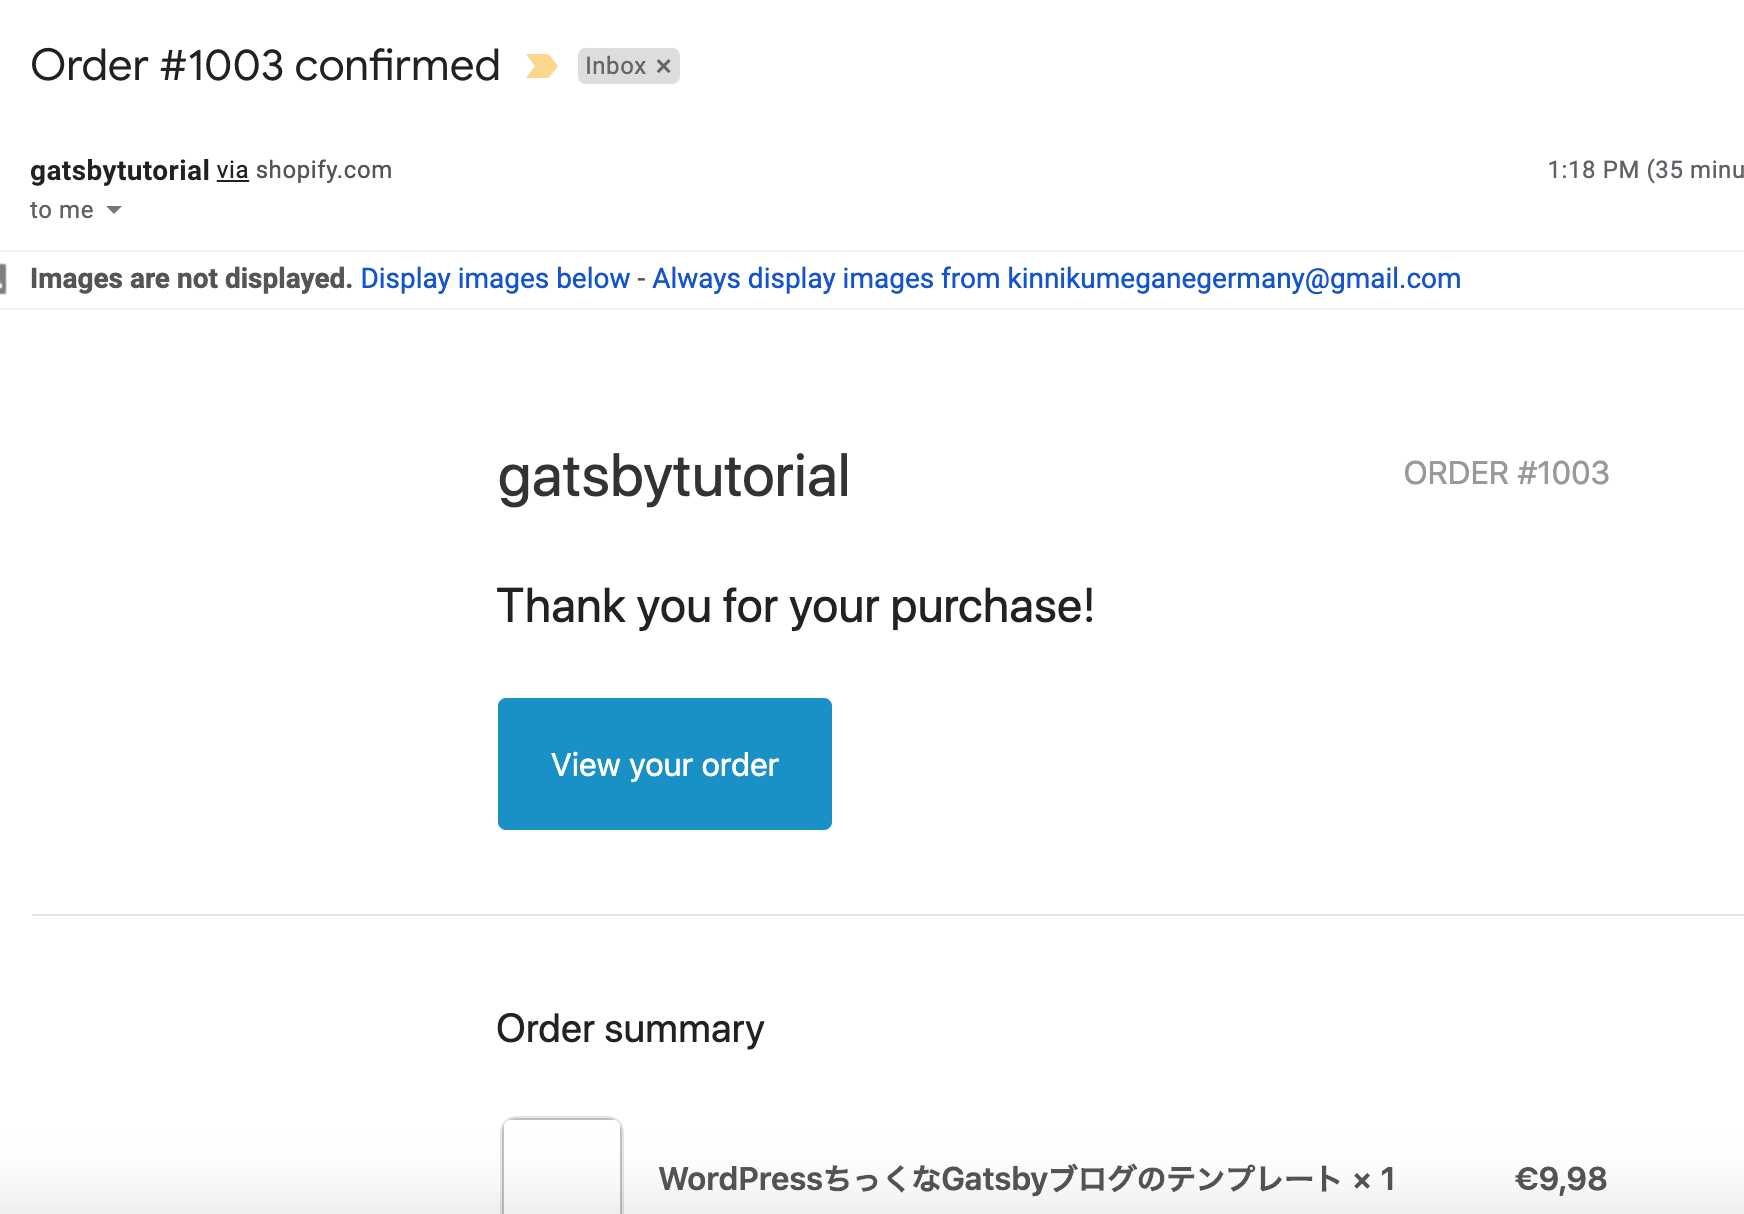
無事に、テストが通りましたね。「Download Now」ボタンを押せば、Digital productのダウンロードがはじまります。
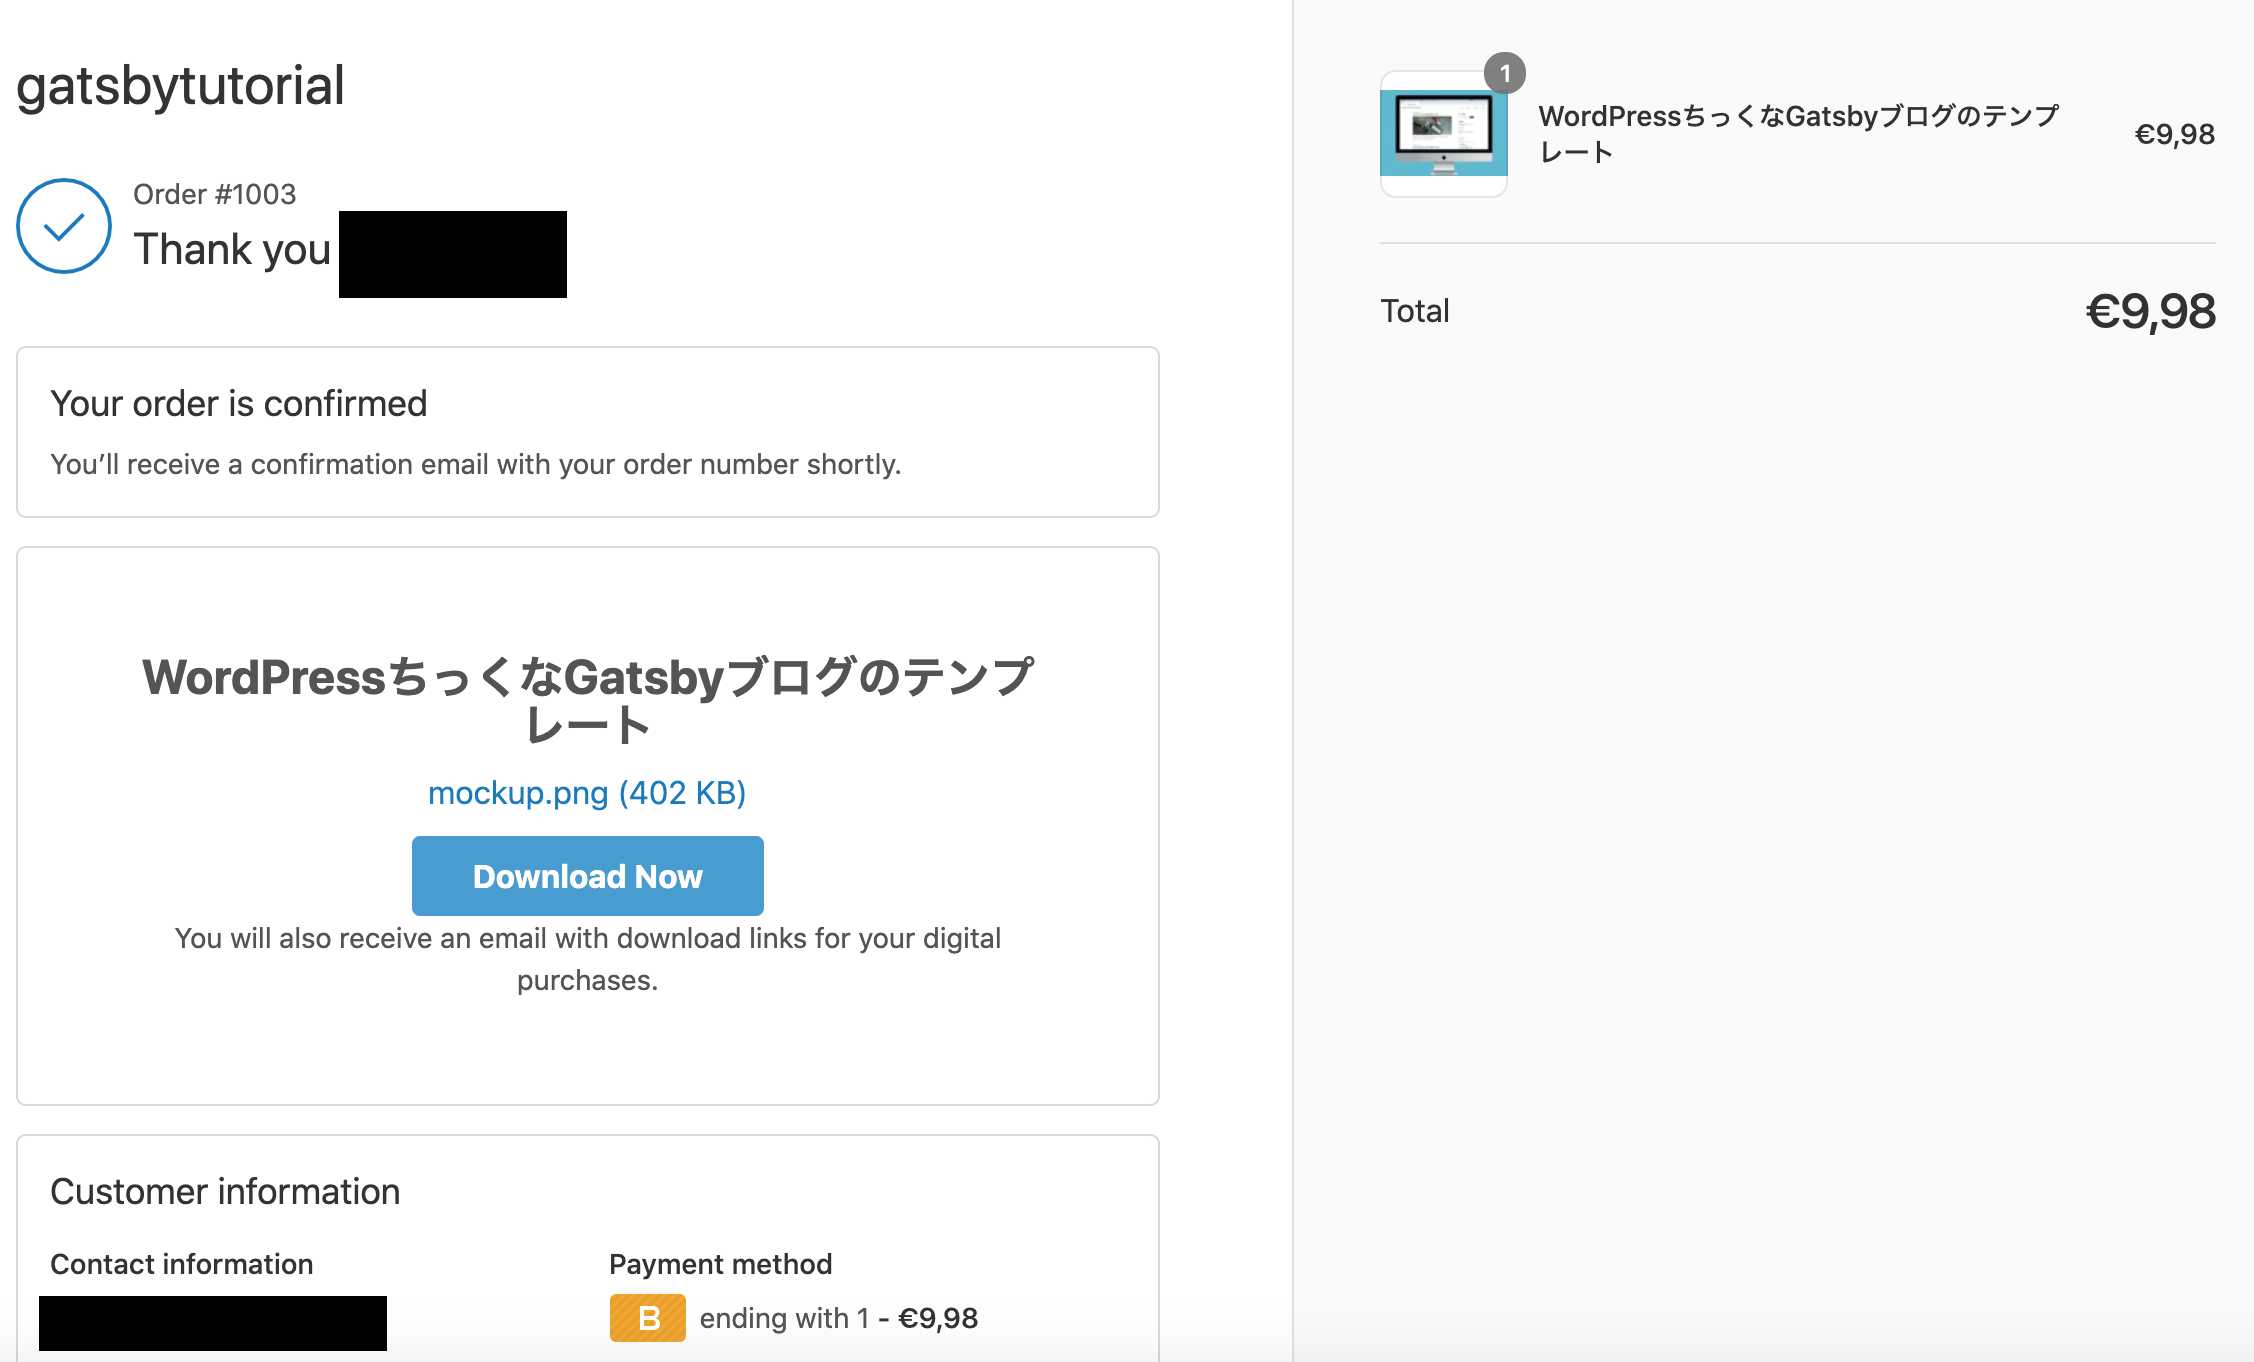
また、メールでも、Order confirmation、そしてDigital Productがダウンロード可能になった、という通知がきます。(計2通)

それでは、決済が失敗するケース(カード番号に2を入力)、そしてExceptionなケース(カード番号に1を入力)をそれぞれ試してみてください。
どちらも予定通りにメッセージが表示されるはずです。
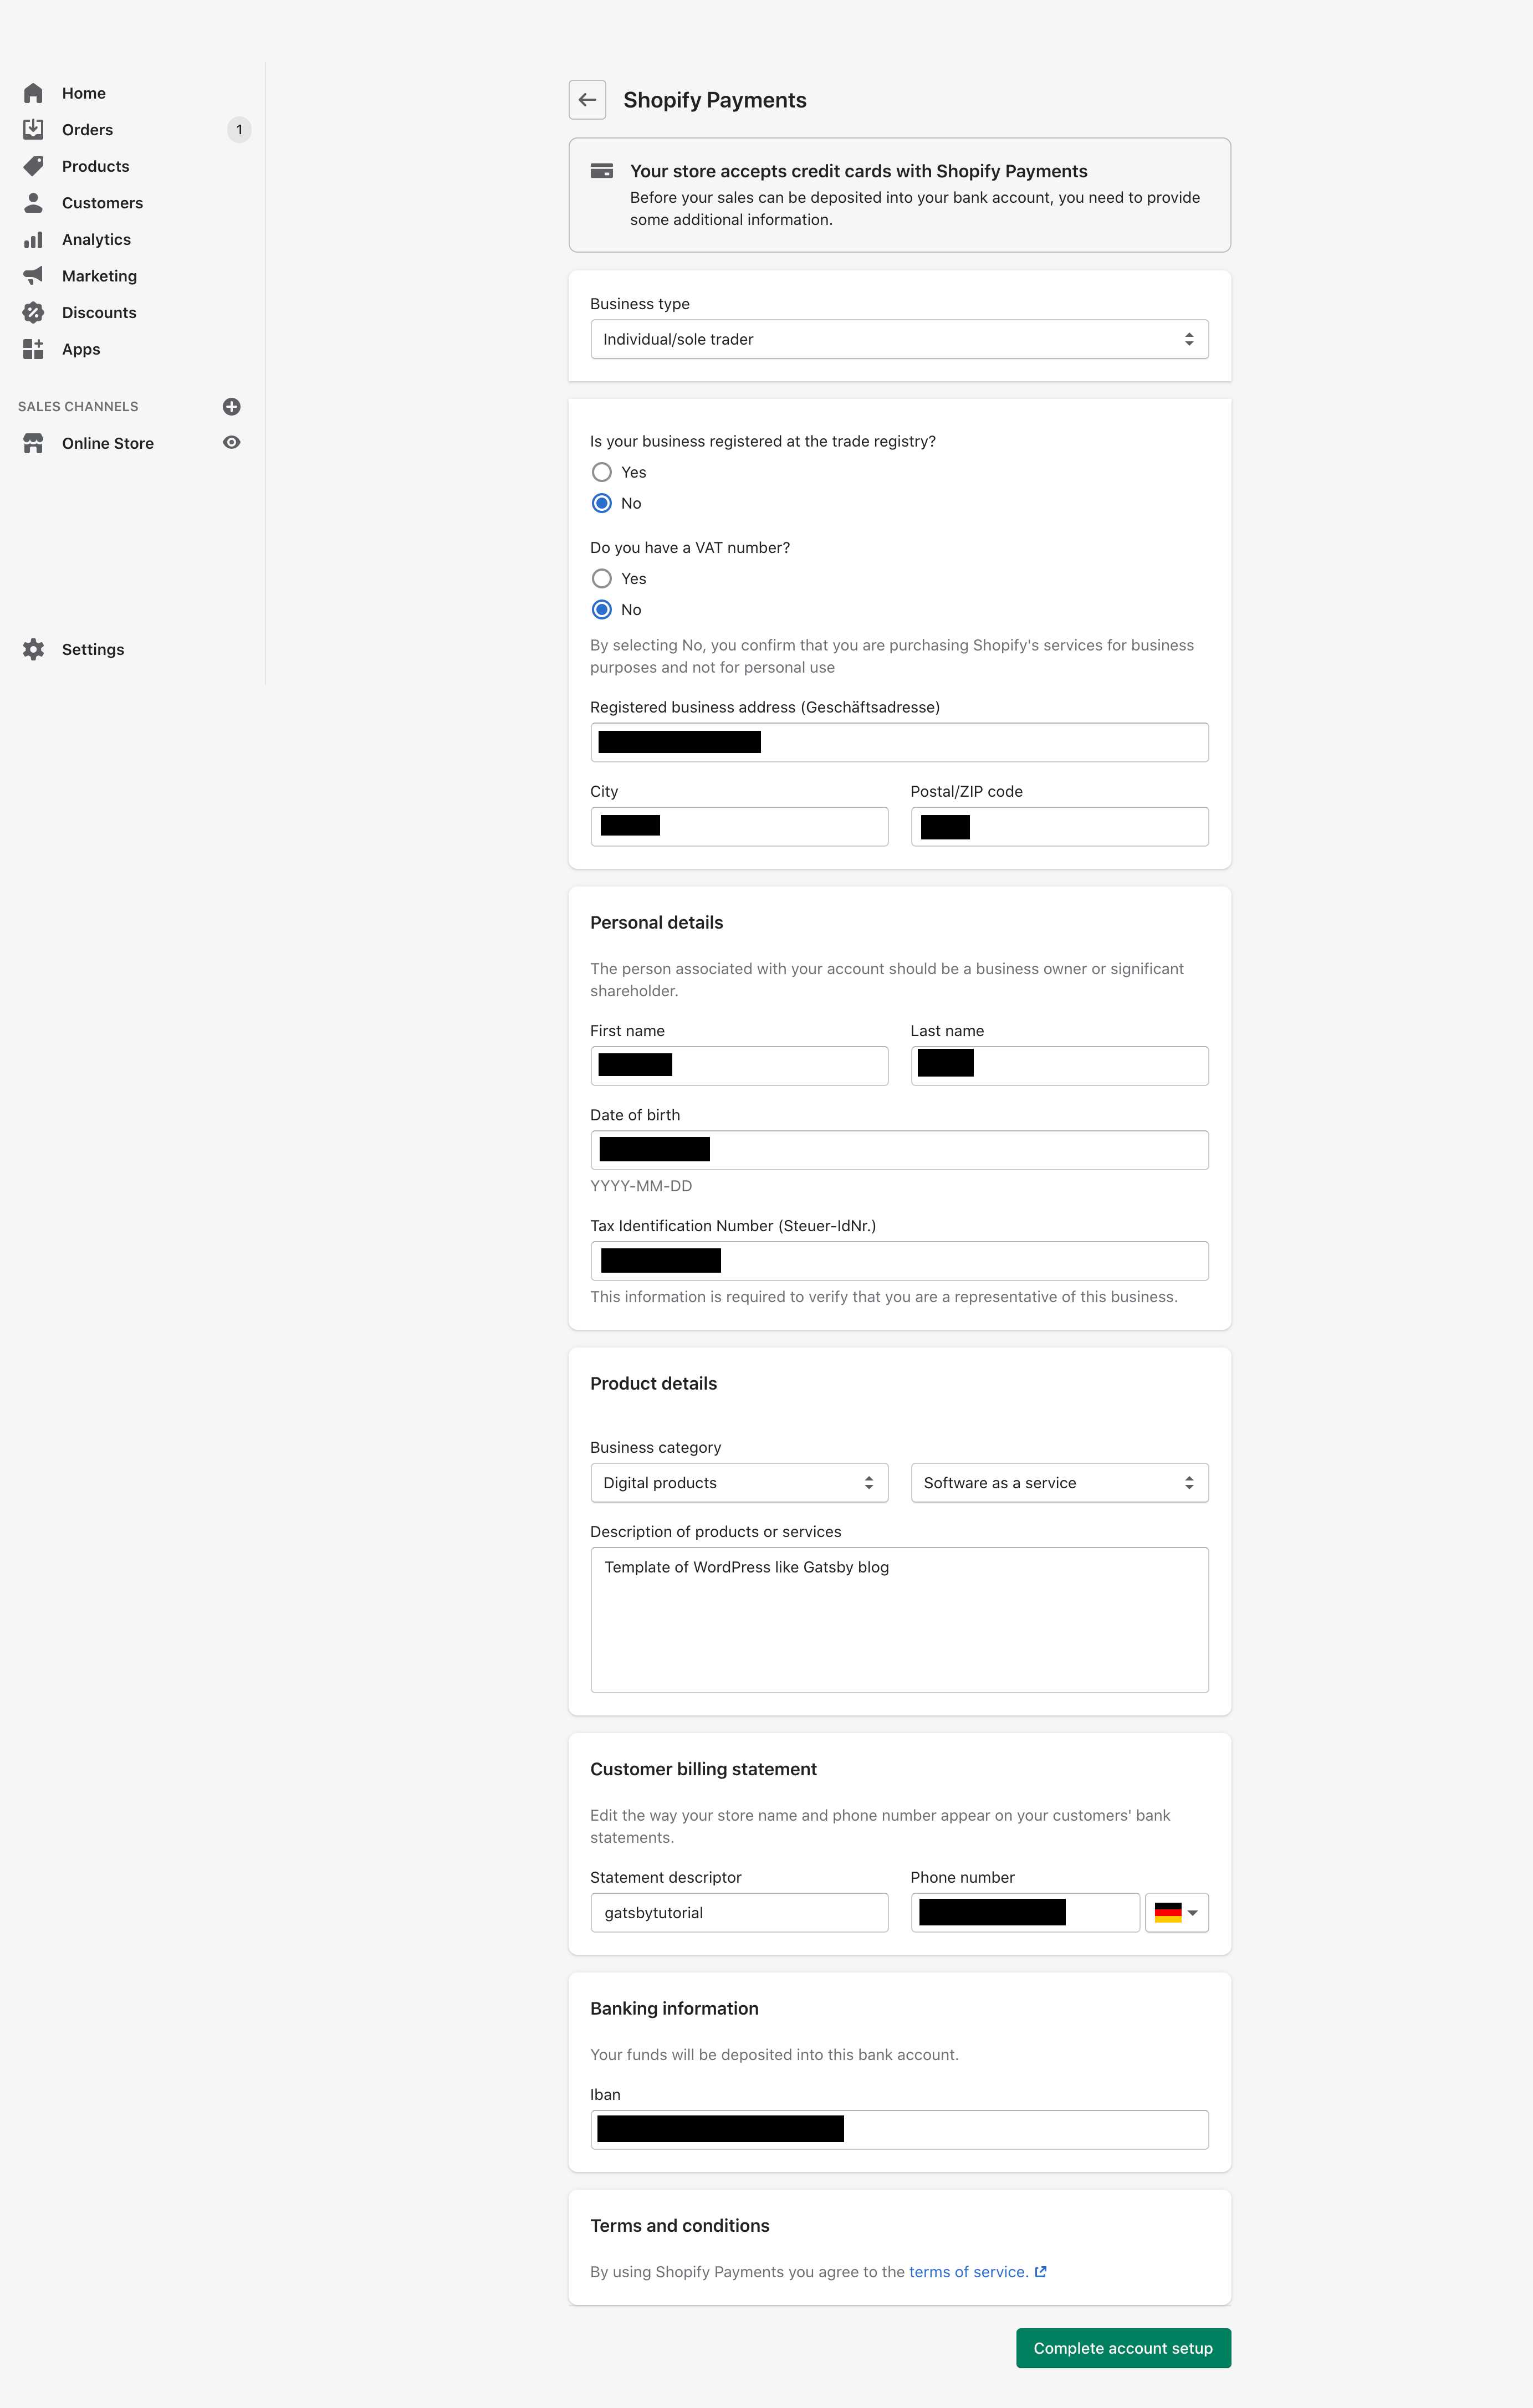
Shopify Paymentの設定
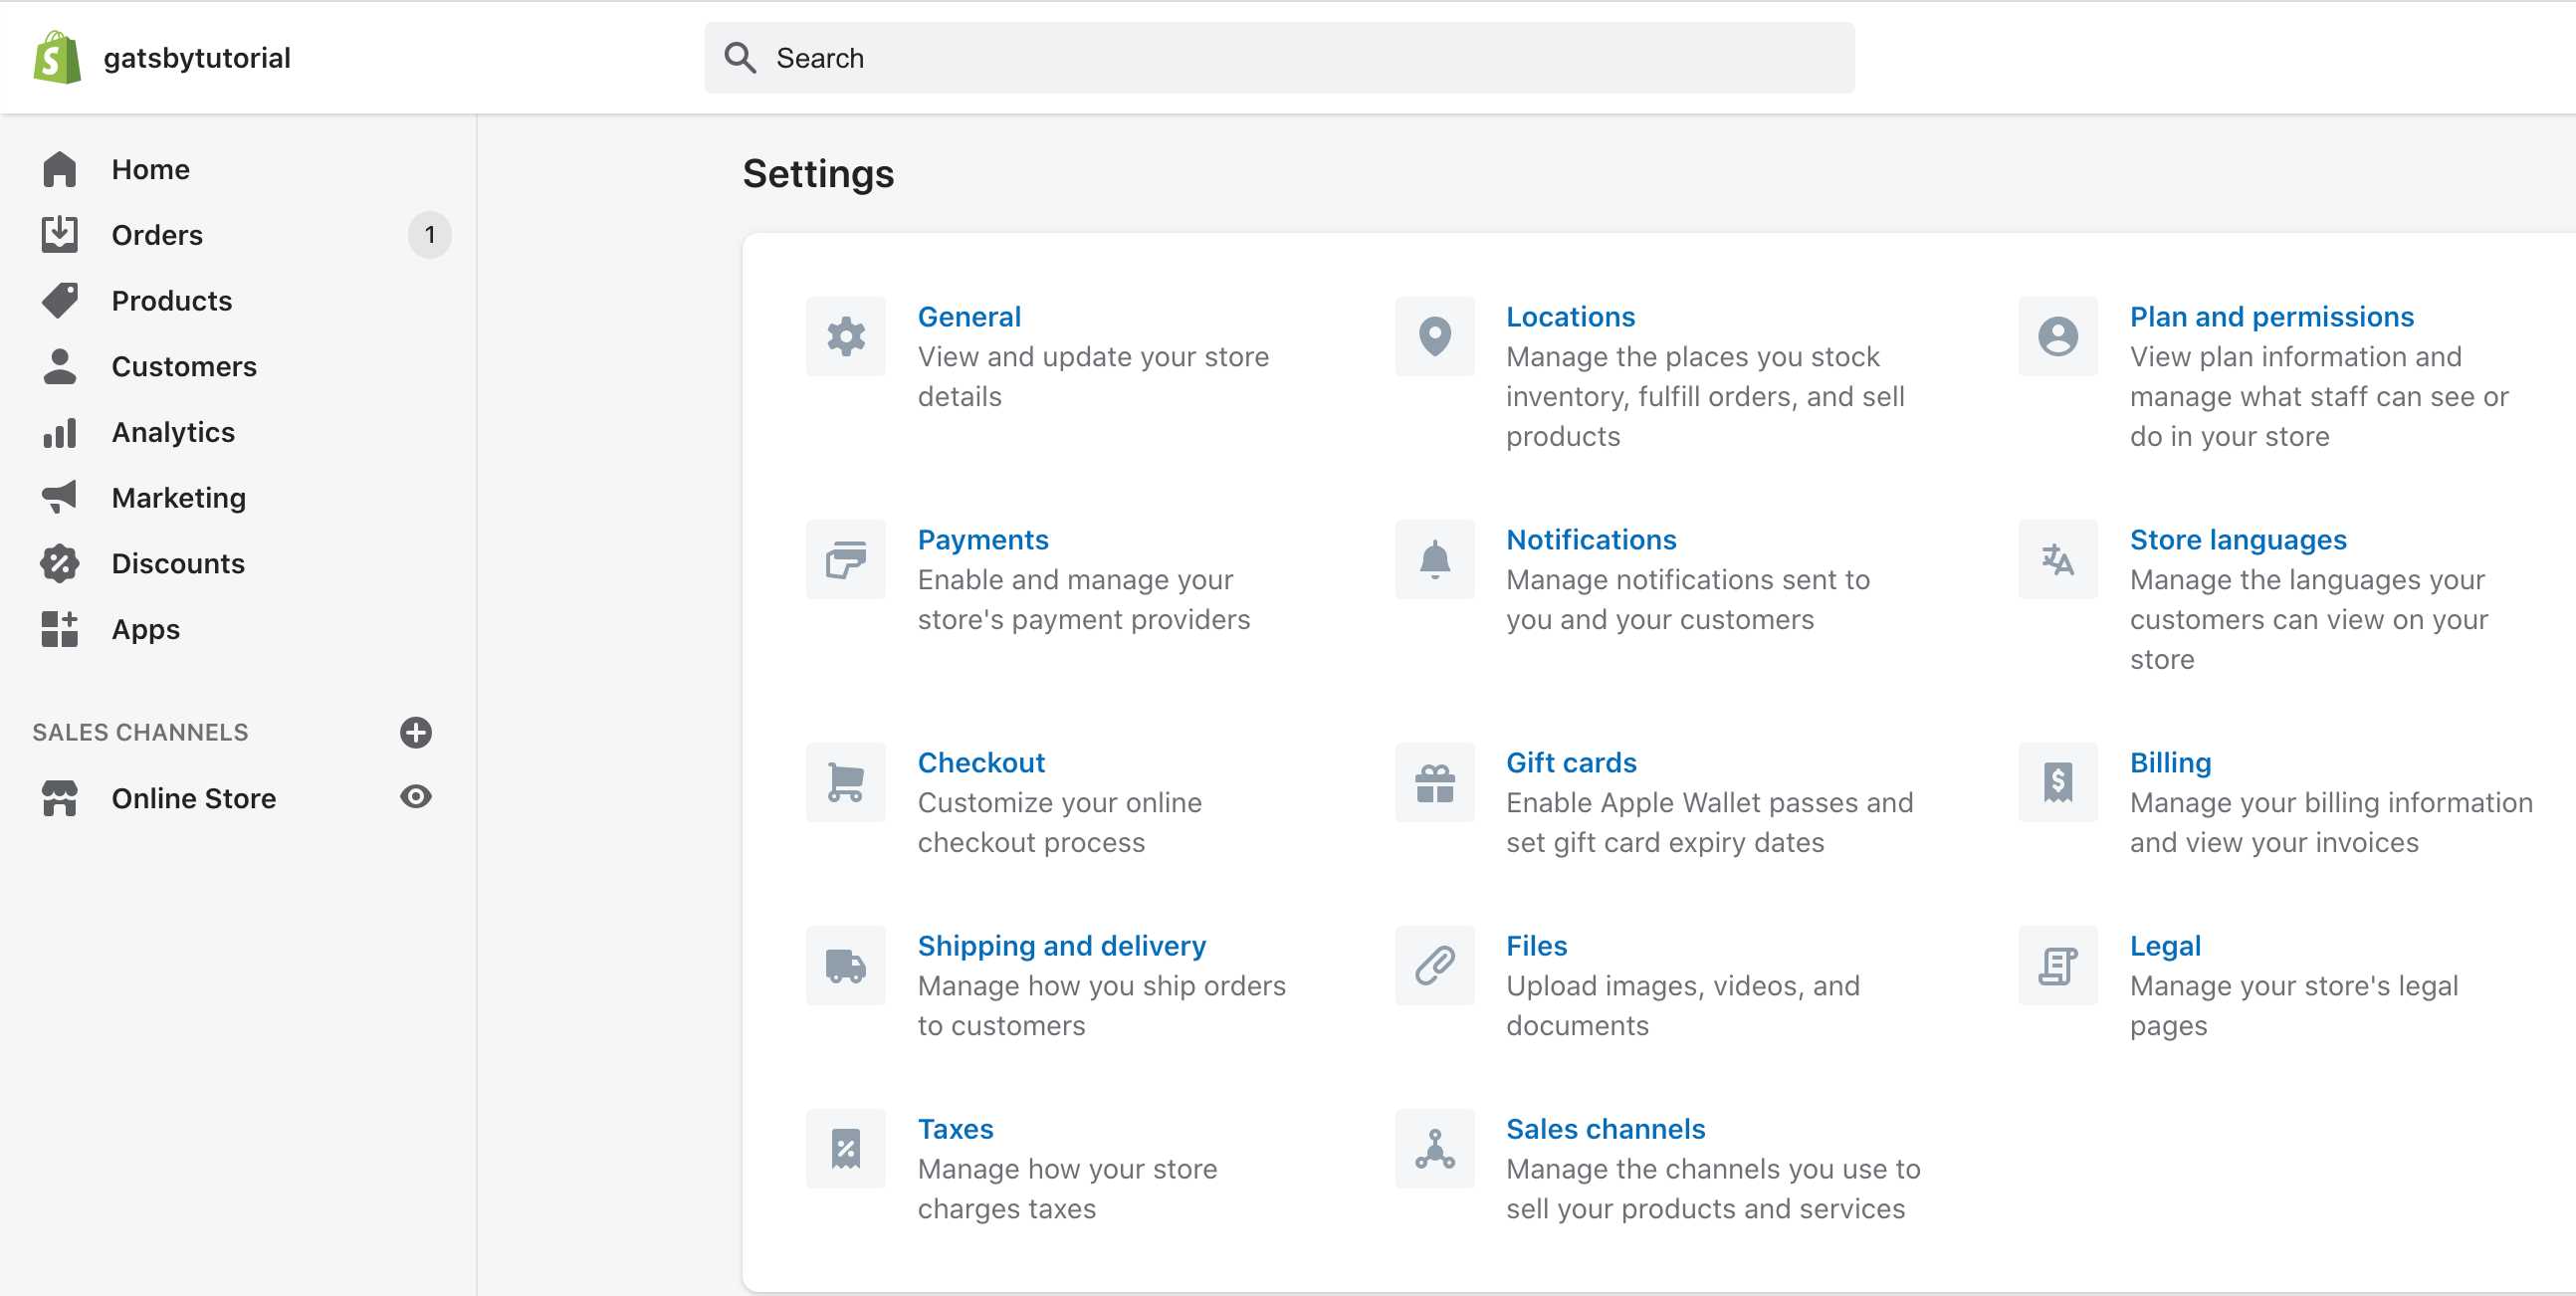
最後に実際の決済機能を設定します。
Shopify topページから、「Settings」、「Payments」を選択します。
一番上に「Shopify payments」が表示されているので、「Activate Shopify Payments」を押します。
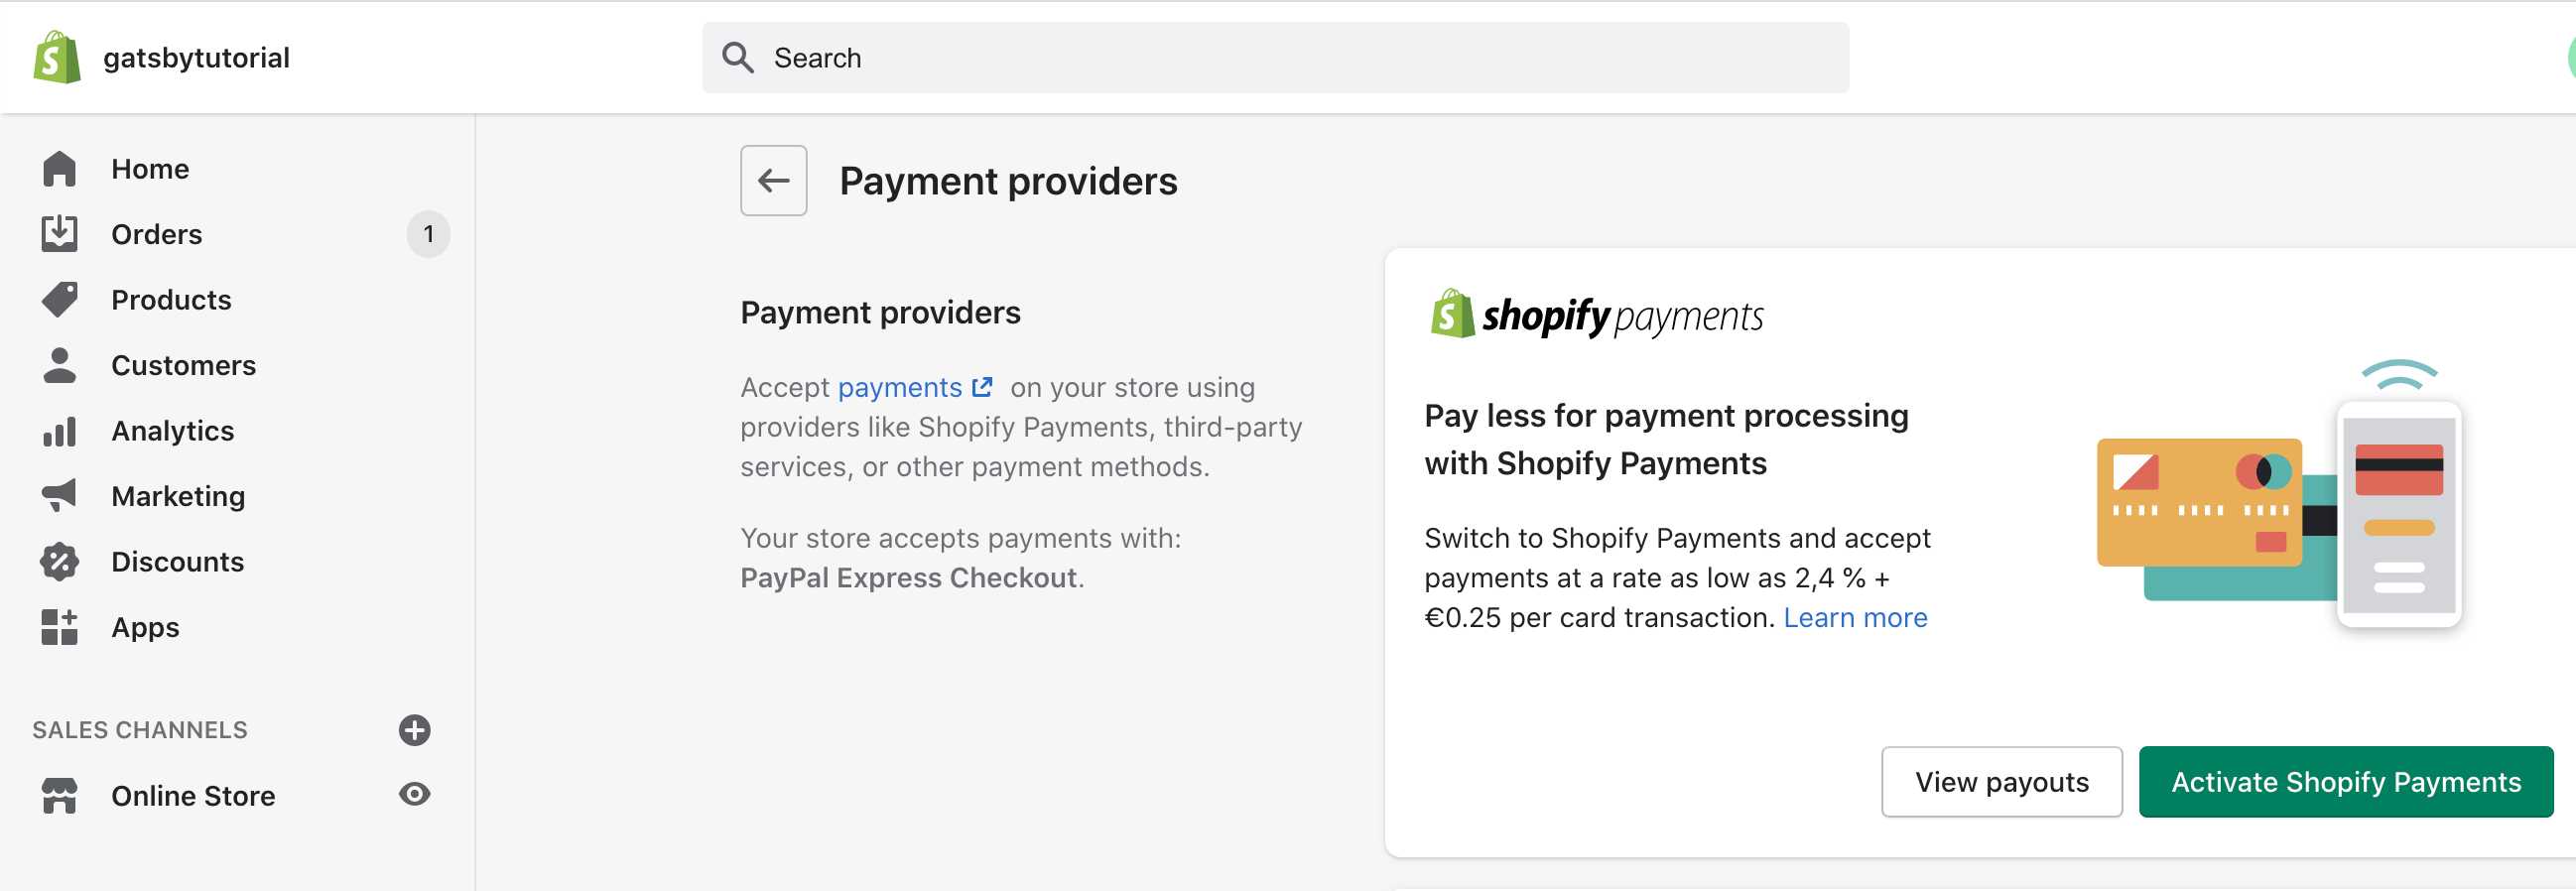
必要事項を入力し、「Complete account setup」を押しましょう。
以上です。
まとめ
本日は、Shopify Liteの決済機能(checkout)をGatsbyサイトに実装する方法について書きました。
オンラインショップで小さく事業を始められたい方、ぜひShopify Liteをお試しください。
ご案内
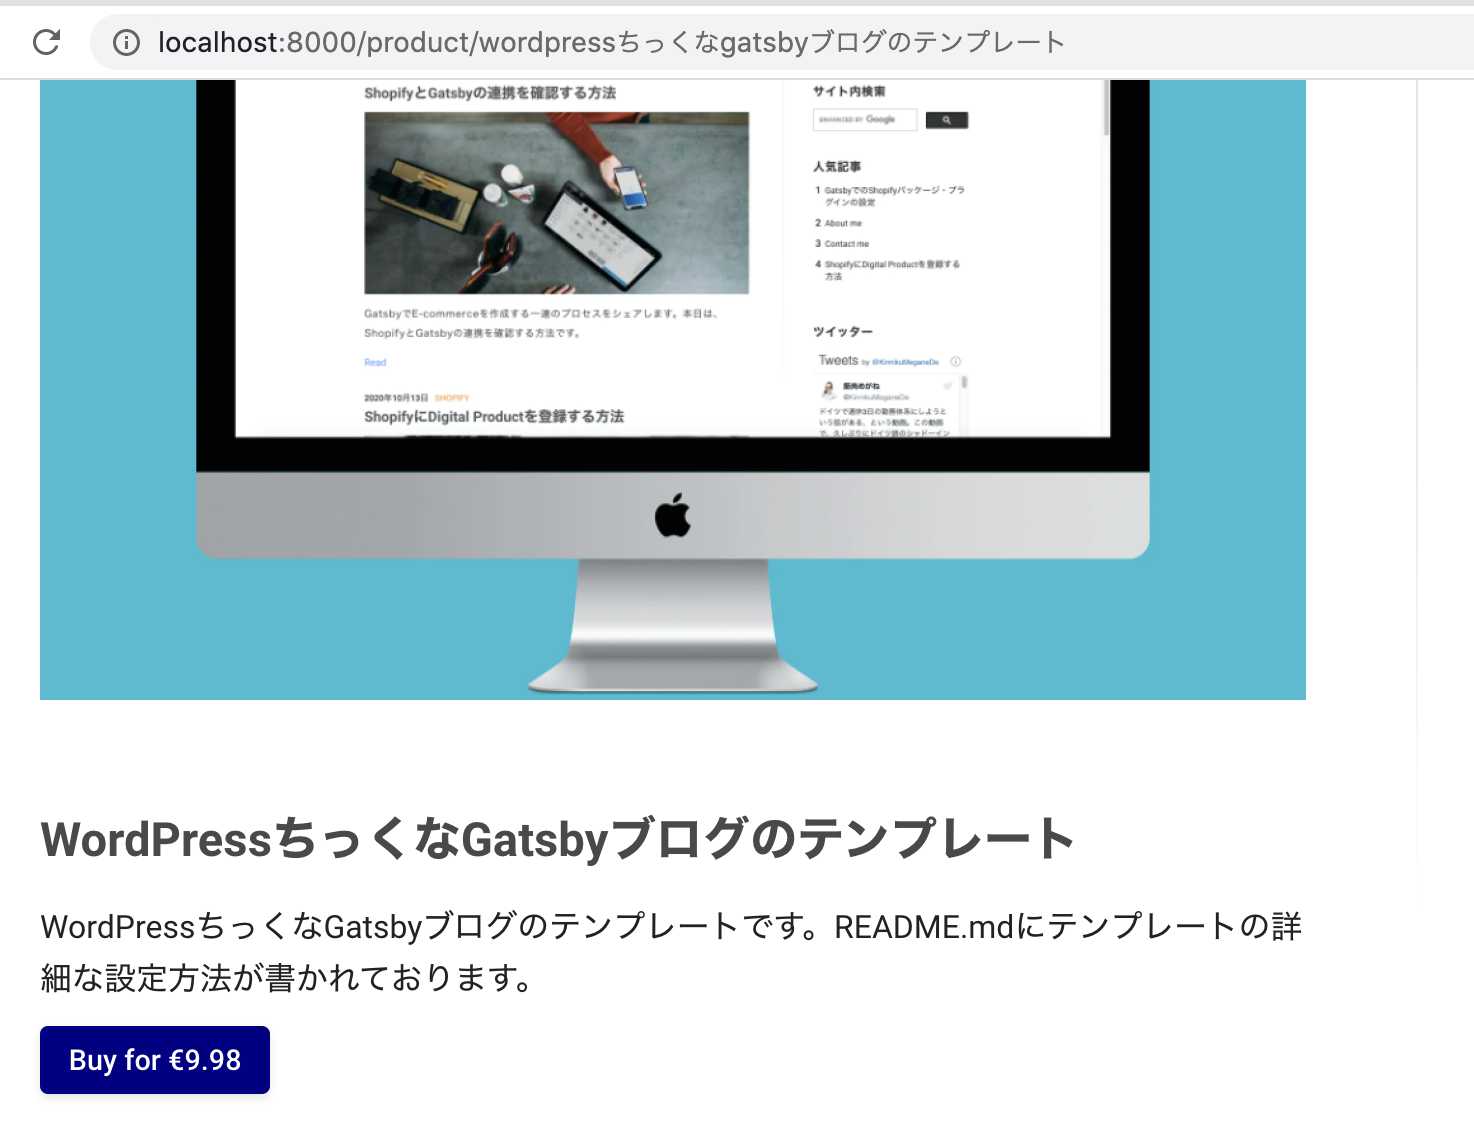
WordPressちっくなGatsbyブログを作りたい方に向けて、noteを書きました。
【完全版】爆速GatsbyでWordPressちっくなブログを作る全手順